When I first started homebrewing, controlling water temperatures during my brew sessions meant pointing the stove knob to high and waiting for a boil. I mostly brewed mini mash or extract recipes back then requiring a few different steps with varying temperatures. If I was over or under a few 10 degrees for my strike or sparge water I thought it really didn't matter. The beer turned out ok and everyone rejoiced. YAY!
Fast forward a decade, a few dozen brewing books read and too many all-grain batches to count, I now know that temperature control on the hot and the cold side of brewing is not only important it is the key to making great beer when others are making ok beer.
I spent a lot of time controlling temperatures on the cold side of the brewing process in my early homebrew days including temperature control during grain, hop and yeast storage, yeast propagation and maturation, fermentation, homebrew aging and serving. Adding controls to these areas definitely made a huge impact on the quality of my brew, so the attention shifted to the hot side to see what further benefits temperature control could add.
I started brewing all-grain in a homemade water cooler system only to find temperature control is not the best even when insulated. Calculating the mash water strike temperature always seemed to be a little off requiring a bump of more hot water to get to the desired temperature or adding ice cubes if you went too far.
If I undershot my temperatures I was not really providing any additional benefits to the mash with a protein rest because the malts were almost always fully modified. These types of malts only required a single infusion mash for conversion.
For single infusion mashing, which is the system most homebrewers use due to its simplicity and the availability of fully modified malts we get these days, the higher temperatures became a problem because if I overshot my temperatures by even 5 degrees some or all of my enzymes would be destroyed. Denature these enzymes and the starch conversion stops leaving you with low fermentable wort. This was too much of a gamble and there had to be a better way.
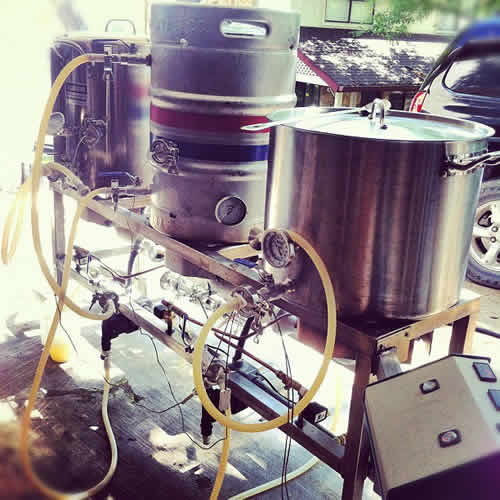
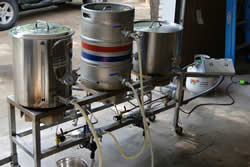
A stainless steel 3 burner system driven off propane with temperature controls was the solution to give me the ability to heat water and hold it at desired temperatures for long periods of time.
Sure, companies make and sell these style systems for homebrewers and I could have just bought one, but I like to build stuff. And sure, I could have gone with an electric system, but I like flames.
I needed a way to measure the water temperature of my Hot Liquor Tank and Mash Lauter Tun vessels and then fire the burners on and off as needed, so I bought a few temperature control switches and wired them into a relay and programmable logic controller(PLC).
I used solenoid gas valves and welded the gas lines inside the stainless steel frame back to a single propane input. I used low pressure Hurricane burners paired with hot surface ignitors (Emerson #767A-380).
Now I could program my PLC to pre-heat the hot surface ignitors and open the propane valves when a set temperature range was reached on the temperature control switch. The burners fire on and fire off. Success!
Now that I had a stage set I needed a cast of characters to actually take the temperature measurements that this system is completely dependent on.
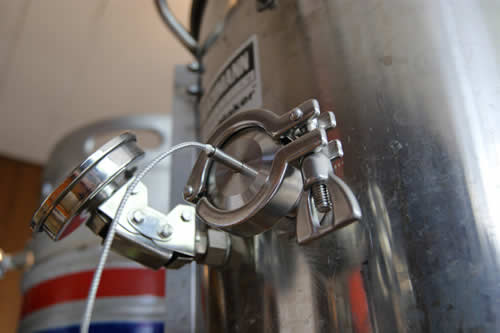
For sanitation and cleaning ease I chose tri-clamp connections throughout the system, so I wanted a tri-clamp thermowell I could easily remove for cleaning too. Luckily I found such a contraption from our friends at MoreBeer! Next I needed a sensor, but what kind? Thermocouple, thermistor and RTD are the standard varieties in the marketplace and I prefer RTD for brewing applications. A higher cost, but you get better accuracy and repeatability which is the whole point.
The result after installation of the RTD temperature controls was precision mashing with target temperatures hit every time.
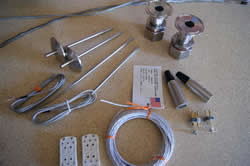
The RTDs, stainless steel braided wire and connectors all came from Omega Engineering. XLR connectors that plug into receptacles were ordered rom Amazon. Weldless bulkheads were from Brewers Hardware. PLC (Programmable Logic Controllers) and relays were from Automation Direct. Gas Solenoid valves sourced from Asco Valves.
Parts, equipment & tool list | |
• Solid Weldless Bulkhead 1/2" MPT X 1/2" FPT • 1.5" Tri Clamp Temperature Probe Thermowell - 5" • 1.5" Tri Camp • 1.5" Tri Clamp Gasket • 1.5" Tri Clamp X 1/2" FPT • XLR Female and Male Connector • General Purpose RTD Probe (#PRTF-10-2-100-1/4-12-E-SB) 3-wire fiberglass insulated, fiberglass Jacketed, stainless steel overbraided cable • Insulated extension probe wire (#EXTT-3CU-26S-25) |
• MFL gas and liquid quick disconnects (threaded) • 3-Prong Mini flat pin Connector for RTD wire • Wire cutters/stripers • Wire shrink tubes and flame • Drill and Step bit • Wrench & Needle tip pliers and screw drivers • Soldering iron and solder |
1. GATHER THE HARDWARE
When you order multiple parts from multiple places online you can expect that not all the parts will arrive at the same time, fit together perfect and in my case, not all the parts even arrived. After a few adjustments in part size and some emails back and forth I finally received all the parts needed to build these RTD thermowells for my mash tun and hot liquor tank. I chose not to add a sensor to the boil kettle because I never really have an issue with my rolling boil temperature. If you wanted to add a sensor to the boil kettle then go for it. Give yourself plenty of time when working on electrical projects like this and always use caution.
2. MOUNT THE BULKHEAD
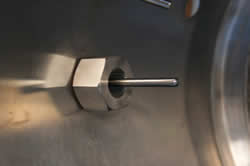
For me, I brew 5 and 10 gallon batches in my 15.5 gallon mash/lauter tun vessel, so I needed to mount the sensor low enough to be submerged during the smaller mashes. I filled the kettle with 3 gallons of water and marked where the top of the water hit. I used a step bit and drilled off to the side of the kettle away from the other connection valves. After sanding and smoothing down the new 7/8" hole I mounted the bulkhead with dual gaskets. This bulkhead is CNC machined from a solid hex of 304 stainless steel. As you can see the 5” thermowell reaches a few inches into the kettle for nice exposure to the mash and water temperatures.
3. WIRE THE PROBES & CONNECTORS
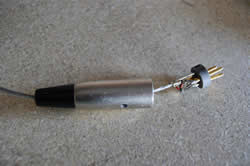
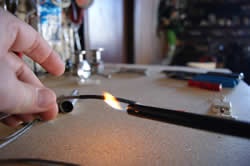
Here is where your soldering skills come in handy. I needed to connect the following: RTD probe =>wire=>shrink tube=>3-pin connector male to 3-pin connector female<=shrink tube<=wire<=XLR male case and connector. Easy right? The main thing to remember is to slide the XLR case and shrink tube onto the wire before making your wire to XLR connection solder. I forgot to do this and it’s not fun to redo. The quick 3-pin connectors use screws for wire connection, so they are very easy. The purpose behind the 3-pin connectors and extension wire is just for extra wire length to reach the control panel. You can get your probes with any length wire you want, but I just thought it would be nice to be able to break the connection in the middle if needed.
4. CHOOSING THE BRAIN (PLC)
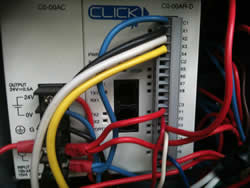
The PLC board I chose for this project was a Click Koyo (#C0-00AR-D ) paired with the stackable power supply (#C0-00AC) The PLC had 8 AC IN / 6 RELAY OUT and required 24 VDC power. I used Zettler relays (#AZ2280) to control various parts of the machine. This is an easy board to work with for newbies and it has free downloadable programming software, online help and video training if needed. Some other popular options are the Brewtroller, BCS-460 (iphone app available) or open source Arduino.
5. BOX IT UP
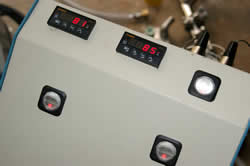
A metal box from Fry’s Electronics was used as my main control panel. I machined out some holes and mounted it on an extension arm from the main chassis. Next I popped in my Auber temperature control switches and LED pump switches. On the backside of the control panel box I mounted the XLR Female Connectors and a master power switch. Under the control panel, on the side of the chassis I mounted a PVC weather resistant box to hold the PLC, power supply and relays and connected the two boxes with a plastic conduit tubing. Through this tube I was able to run the necessary control wire and power wires.
6. CONNECT AND TEST
Before I clicked in the temperature sensors and got to brewing I needed to make sure to set the Auber temperature controller to read from RTD sensors and not the default thermistors. If you forget to make these setting changes your readings will be off or may not even read anything at all. Next I put the probes into a glass with a slurry of crushed ice and water. Let it rest for a minute or two until the temperature stabilized. I wrote down the temperature it was reading, then subtracted that number from 32. So if you read 42°F then 42-32=-10. I found the Pb value in the configs menu and made it match the number I calculated. I was calibrated. Finally I tested a few batches of water through the system and was ready to brew!.
Christian Lavender is a home brewer in Austin, TX and founder of Kegerators.com and HomeBrewing.com. |
Related Articles:
Build a Home Brewing Kegerator Fermentation Chamber - Control your fermentation temperatures.
Keeping Homebrew Chill - Temperature controllers for homebrew.
How to Protect and Store Grain, Hops & Yeast - Protecting your home brewing ingredients from the elements